

Introduction
When we are designing and implementing a new Alexa Custom Skill, one of the first questions we ask ourselves is whether we have access to user’s email or not. Recently (July 2018), Amazon Alexa’s Team released a new feature to allow Alexa Skill’s Developers to request users to access resources like email, phone and customer name. Until that time, we only were able to request permissions for Device Address and Lists.
There is a blob post from Alexa's Team explaining how to request customer contact information.
Account Linking vs Permissions on gathering user’s email
Until now, there were some scenarios like sending detailed information to customers over email that required Account Linking either with Amazon or Custom Authentication Provider. But with this new feature if we only do Account Linking to gather the user email, then we don’t need it anymore and we can use this simpler approach to get permissions from the user and get their email.
Skill configuration to request customer permissions.
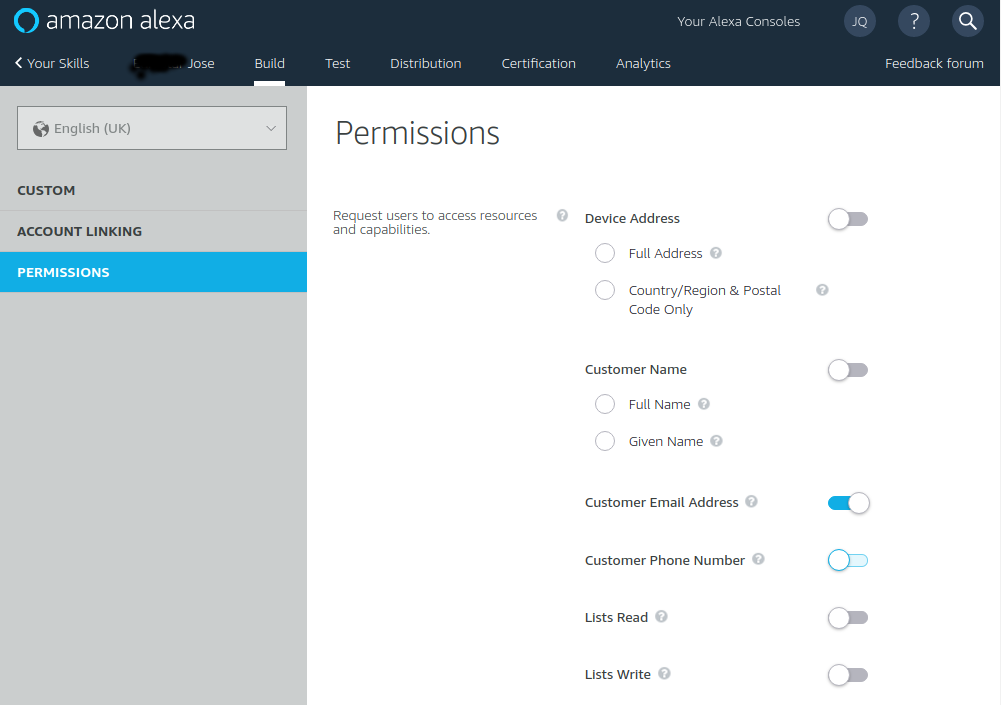
Using Amazon Developer Console we can manage our skill. Navigate to the Build -> Permissions page in the console and select Customer Email Address:
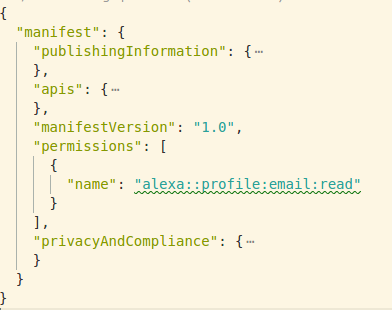
Note: If you are using
ask-clito configure and update your skill then you should add permissions in yourskill.json:
Get user’s email in our code
In order to get the email to be used in our code, we have to do query Amazon’s API asking for it and we have to use the field apiAccessToken provided under context -> System in our handlerInput object.
apiAccessToken
Before going forward and showing the code, I’d like to share the different scenarios we can have and the different outputs for the property apiAccessToken.
User denies
Email Addresspermission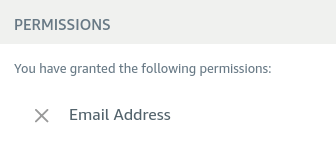
1
2
3
4
5
6
7
8
9
10
11
12
13
14
15
16
"context": {
"System": {
"application": {
"applicationId": "amzn1.ask.skill.<skill-id>"
},
"user": {
"userId": "amzn1.ask.account.<user-id>"
},
"device": {
"deviceId": "amzn1.ask.device.<device-id>",
"supportedInterfaces": {}
},
"apiEndpoint": "https://api.amazonalexa.com",
"apiAccessToken": "eyJ0e....<rest-of-jwt-token>"
}
}Note that even if we have no permissions added to our skill, we still get
apiAccessTokenproperty. If we inspectapiAccessTokenJWT token using https://jwt.io, we can see the belowpayload datawhereprivateClaims.consentTokenisnull:1
2
3
4
5
6
7
8
9
10
11
12
13{
"aud": "https://api.amazonalexa.com",
"iss": "AlexaSkillKit",
"sub": "amzn1.ask.skill.<skill-id>",
"exp": 1633532432,
"iat": 1633528832,
"nbf": 1633528832,
"privateClaims": {
"consentToken": null,
"deviceId": "amzn1.ask.device.<device-id>",
"userId": "amzn1.ask.account.<user-id>"
}
}User grants
Full Namepermission but deniesEmail Addresspermission.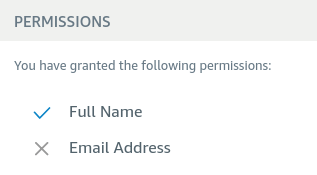
1
2
3
4
5
6
7
8
9
10
11
12
13
14
15
16
17
18
19"context": {
"System": {
"application": {
"applicationId": "amzn1.ask.skill.<skill-id>"
},
"user": {
"userId": "amzn1.ask.account.<user-id>",
"permissions": {
"consentToken": "eyJ0e...<rest-of-jwt-token>...lFkHDw"
}
},
"device": {
"deviceId": "amzn1.ask.device.<device-id>",
"supportedInterfaces": {}
},
"apiEndpoint": "https://api.amazonalexa.com",
"apiAccessToken": "eyJ0e...<rest-of-jwt-token>...rTyOD"
}
}Note, apart from having a different
apiAccessToken, now we also have a newpermissionsproperty underuser. Now, if we inspectapiAccessTokenusing https://jwt.io, we can see howconsentTokenis notnullbecause it has permissions forNameincluded on it. But still if we try to authenticate to Amazon’s API to query foremailwith that token, it will fail with 403 Forbidden:1
2
3
4
5
6
7
8
9
10
11
12
13{
"aud": "https://api.amazonalexa.com",
"iss": "AlexaSkillKit",
"sub": "amzn1.ask.skill.<skill-id>",
"exp": 1633532432,
"iat": 1633528832,
"nbf": 1633528832,
"privateClaims": {
"consentToken": "Atza|...<rest-of-amazon-token-authorizing-full-name>...",
"deviceId": "amzn1.ask.device.<device-id>",
"userId": "amzn1.ask.account.<user-id>"
}
}User grants
Email Addresspermission1
2
3
4
5
6
7
8
9
10
11
12
13
14
15
16
17
18
19"context": {
"System": {
"application": {
"applicationId": "amzn1.ask.skill.<skill-id>"
},
"user": {
"userId": "amzn1.ask.account.<user-id>",
"permissions": {
"consentToken": "eyJ0e...<rest-of-jwt-token>...lFkHDw"
}
},
"device": {
"deviceId": "amzn1.ask.device.<device-id>",
"supportedInterfaces": {}
},
"apiEndpoint": "https://api.amazonalexa.com",
"apiAccessToken": "eyJ0e...<rest-of-jwt-token>...rTyOD"
}
}It is almost look a like of scenario’s 2 token, the difference is
consentTokenis different and now it does allow querying for email.1
2
3
4
5
6
7
8
9
10
11
12
13{
"aud": "https://api.amazonalexa.com",
"iss": "AlexaSkillKit",
"sub": "amzn1.ask.skill.<skill-id>",
"exp": 1633532432,
"iat": 1633528832,
"nbf": 1633528832,
"privateClaims": {
"consentToken": "Atza|...<rest-of-amazon-token-authorizing-email>...",
"deviceId": "amzn1.ask.device.<device-id>",
"userId": "amzn1.ask.account.<user-id>"
}
}User grants
Email Addresspermission + User authenticate throughAccount Linkingas well We can have both working together, Account Linking + Permissions for email. The main difference in terms of thehandlerInputschema is, we willuser.accessTokenproperty which we can use to authenticate and authorize against our custom Authentication Server:1
2
3
4
5
6
7
8
9
10
11
12
13
14
15
16
17
18
19
20"context": {
"System": {
"application": {
"applicationId": "amzn1.ask.skill.<skill-id>"
},
"user": {
"userId": "amzn1.ask.account.<user-id>",
"accessToken": "eyJ0...<jwt-account-linking-access-token>...",
"permissions": {
"consentToken": "eyJ0e...<rest-of-jwt-token>...lFkHDw"
}
},
"device": {
"deviceId": "amzn1.ask.device.<device-id>",
"supportedInterfaces": {}
},
"apiEndpoint": "https://api.amazonalexa.com",
"apiAccessToken": "eyJ0e...<rest-of-jwt-token>...rTyOD"
}
}Note that giving permissions and doing account linking are two separate processes for Alexa Skill. So, they can be used together or by its own.
Calling Amazon’s API to get user’s email
Finally, after understanding what apiAccessToken does for the different scenarios, let’s put our hands on and actually do the code that will access to Amazon’s API from our intent:
1 | const axios = require("axios"); |
Recap
- We can use either Amazon Development Console or ASK CLI to request access for
Emailpermissions to our users. - Account Linking and Permissions are independent features and they can be used together or separately.
- Depending on the configuration and the user input we will have different outputs on
apiAccessToken. - Accessing to user’s
emailwill require to call Amazon’s API withapiAccessTokenas a Authentication Bearer header.